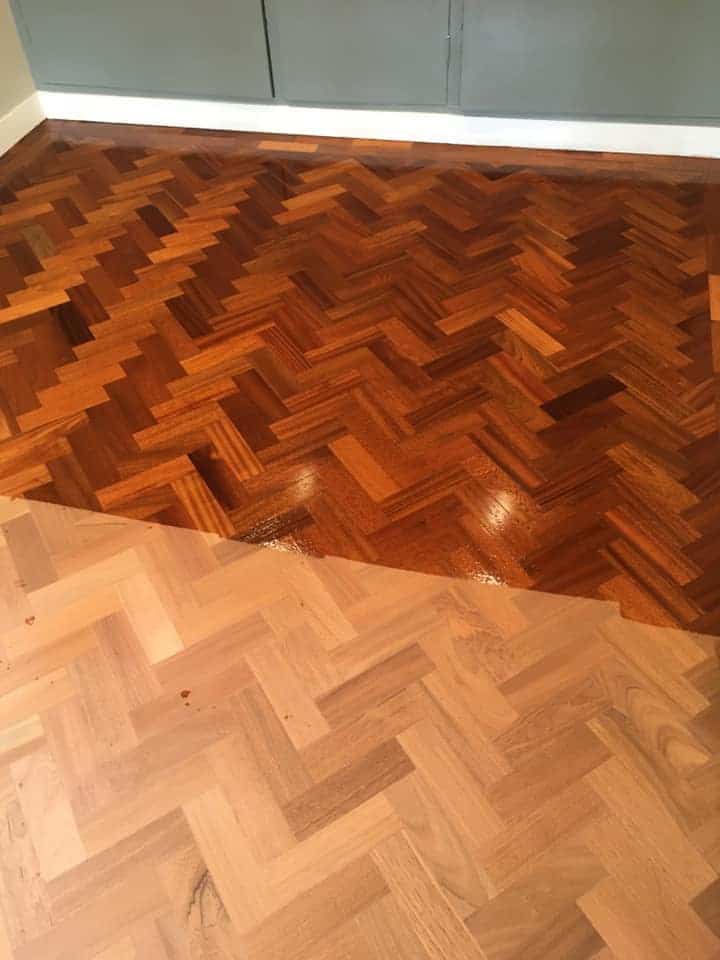
‘How to restore timber floors‘ isn’t just a matter of sanding and sealing, especially when you want results that last. If you’re considering whether to restore a wood floor yourself or hire someone, the question isn’t just about skill. It’s about the tools, the knowledge, and the ability to diagnose and treat problems properly.
At Sussex Floor Restoration, we know how to restore wood floor surfaces of all types, especially the complex, character-rich timber floors found in homes across Sussex. Here’s what it really takes to do it right, and why so many floors need more than just a weekend with a sander.
Summary: How to Restore Timber Floors and When to Call a Professional
To restore timber floors, professionals assess the condition, sand using dust-free equipment, fill gaps, and apply the right finish based on the wood type. Floors with deep scratches, uneven wear, or old finishes can usually be restored.
You should replace floorboards only when they’re split, rotten, warped, or too thin to sand. DIY sanding often causes damage; hiring a professional ensures your floor is restored safely, evenly, and with long-lasting results.
Why Restoring Timber Floors Isn’t a One-size-fits-all Process
Every wooden floor is different. The timber species, age, cut, previous finishes, and even how the floor has been cleaned over the years all affect what approach we take.
We may:
- Sand back to fresh wood using multiple stages of grit sandpaper,
- Repair damaged boards before sanding begins,
- Use different sealers depending on the timber’s natural tone,
- Avoid full sanding if the boards are too thin (e.g. old pine or engineered veneer),
- Deep clean and screen existing finishes if full restoration isn’t required.
What works for a polyurethane finish on a modern hardwood floor might not be suitable for 200-year-old oak boards.
Our Restoration Method (and Why It Matters)
We don’t offer “standard” packages, because there’s no such thing as a standard timber floor. But most restorations follow a carefully designed process that looks like this:
Step 1: Inspect and test the floor
We assess how deep wear and tear has gone, test for previous finishes, and spot risks like raised nails, damp, or cupping. This informs whether we can sand fully, or need a more delicate approach.
Step 2: Prepare, clean and secure
Before sanding, we clean thoroughly to remove grit (which can cause deep scratches) and secure any movement. This might mean plugging old screw holes or replacing a few boards, critical prep work before anything touches the drum.
Step 3: Sanding with the right sequence
We start with coarser grit sandpaper to level the floor and remove scratches, then move to fine grit for a smooth finish. Most jobs use four or more grades of paper. Our machines are dust-controlled to protect your home and avoid contaminating finishes.
Step 4: Gap filling (if needed)
We may fill gaps using resin or timber slivers, depending on the floor’s age and stability. This helps reduce draughts and gives a more polished final result.
Step 5: Staining and finishing
We test wood stains on your actual floor (not a swatch) to ensure the colour works with your light, your walls, and your style. Then we apply the right protective seal, whether that’s a polyurethane finish for durability or an oil-based product for a natural look.
Step 6: Cure, protect and guide
Once cured, we explain how to clean and maintain the floor properly, including which products to use and avoid. We’ll also give guidance on rugs, furniture pads and traffic flow to help preserve your investment.
What Can Go Wrong If I DIY?
Plenty. We’re often called to fix botched attempts where someone has:
- Used the wrong floor cleaner or tried vinegar (never!)
- Rented poor-quality sanders that left chatter marks
- Skipped the dust mask and created an unsafe environment
- Applied thick, uneven layers when applying the finish
- Sanded through the wear layer of engineered boards
Restoration isn’t just about knowing what to do; it’s knowing when not to do something. That comes with experience.
Table: When to Restore vs. When to Replace Timber Floors
Why hiring a professional matters more than ever in 2025
Today’s floor restoration standards are higher than ever. Homeowners want smoother finishes, sustainable products, and less mess, all without compromising durability. That means:
- Smarter sanding (with better dust control)
- Eco-friendly sealing with low-VOC finishes
- Tailored care plans for different timbers and usage needs
- No disruption to your household while work is ongoing
We’re trained, insured, and equipped with tools far beyond what you’ll find at a hire shop, and our results speak for themselves.
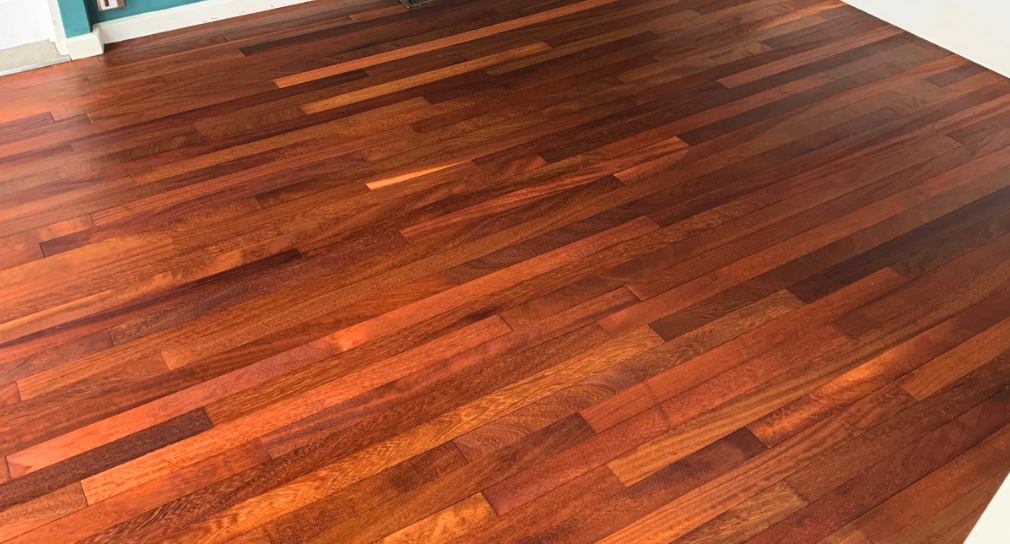
Restore Your Floor Right
Timber floors are durable, but they’re not invincible. To restore your floor properly, you need more than good intentions; you need the right method for your material. Whether you’ve got newly uncovered floorboards or a much-loved hardwood floor, we can help you bring it back to life.
See our Floor Restoration Process page, or call our team on 01444 810505.
Looking for more great reads? You should take a look at Parquet Flooring Restoration in 2025 – Your Wood Flooring Guide!
FAQs
How do professionals restore timber floors?
Professionals restore timber floors by sanding the surface with industrial equipment, repairing damage, filling gaps, and applying a high-quality finish. The process is tailored to the wood type, thickness, and condition of the floor.
Can all wood floors be restored, or do some need replacing?
Not all wood floors can be restored. If boards are split, rotted, or too thin from previous sanding, they’ll need replacing. Most cosmetic damage, however, can be resolved through expert restoration.
What’s the difference between sanding and restoring a wood floor?
Sanding is one part of restoring a wood floor. Full restoration includes sanding, repairs, gap filling, finishing, and aftercare, providing structural improvement as well as a fresh appearance.
Is it worth hiring a professional to restore a timber floor?
Yes, hiring a professional ensures the correct sanding sequence, safe removal of old finishes, and a durable result. DIY mistakes can lead to uneven finishes, deep scratches, or irreparable damage.
How long does it take to restore a wooden floor?
Restoring a wooden floor usually takes 1–3 days, but this varies depending on the room size and condition. This includes preparation, sanding, finishing, and drying time between coats. Faster methods may compromise quality.
How do I know if my timber floor is too thin to sand?
If the tongue is exposed or the boards flex under pressure, your floor may be too thin to sand. A professional can measure the wear layer and advise safely.
Can gaps between wooden boards be filled during restoration?
Yes, most gaps can be filled using resin, flexible filler, or timber slivers. This improves insulation, reduces movement, and gives the floor a more polished appearance after sanding.
Do restored wood floors need regular maintenance?
Yes, restored wood floors benefit from weekly dry cleaning, damp mopping with a neutral cleaner, and periodic resealing based on wear. Proper care extends the life of the finish.
What finish is best after restoring a timber floor?
The best finish depends on use and aesthetic. Polyurethane offers durability for high-traffic areas, while natural oils highlight wood grain and are easier to refresh over time.
Can engineered wood flooring be restored like solid timber?
Engineered wood can be restored if the top veneer is thick enough. Most can handle one or two sandings. A professional inspection will confirm if restoration is safe.
Updated October 2025