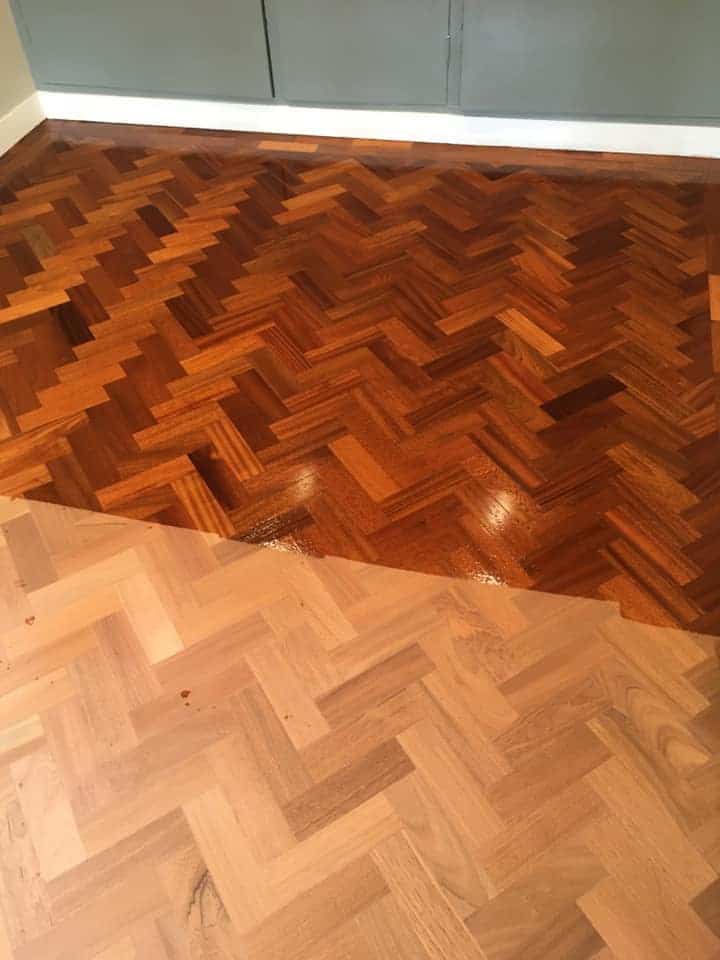
How to revive a wooden floor is one of those questions that usually starts when the surface has gone dull, marked, tired or a bit lifeless. The good news is that many wooden floors have far more potential left in them than people realise. With the right restoration process, you can breathe new life into the whole room while keeping the warmth, grain and character that made the floor worth saving in the first place.
At Sussex Floor Restoration, we focus on full-area wood flooring restoration. That means looking at the whole surface of the floors, not just the obvious worn patches, so the finished result feels consistent, balanced and built to last.
Quick Summary
Reviving a wooden floor usually involves cleaning, preparation, sanding, filling where suitable, finishing and aftercare. A professional wood floor sanding company can help bring tired wooden floors back to life by removing old finishes, smoothing the surface and applying a high quality protective finish. The best results come from treating the floor as one complete area, so the colour, sheen and feel work properly across the room.
Why Wooden Floors Start to Look Tired
Wooden floors naturally change with age and use. Foot traffic, furniture movement, old coatings, sunlight and everyday wear and tear all affect the surface over time. What once looked rich and even can start to appear patchy, grey, scratched or flat.
Common signs that a wooden floor could benefit from restoration include:
- A dull or uneven surface
- Scratches, scuffs and worn walkways
- Old varnish that has yellowed or darkened
- Dirt sitting in the grain or edges
- A finish that no longer protects the wood properly
- A room that feels darker because the floor has lost its warmth
This does not always mean the floor has reached the end of its life. In many cases, the timber underneath still has plenty to give. The aim is to reveal that properly, rather than covering it up or trying to make a tired finish work harder than it can.
How to Revive a Wooden Floor Properly
The best way to revive a wooden floor is to follow a complete restoration process. Each stage has a purpose, and rushing one part can affect the final finish.
A typical process looks like this:
- Assess the floor, including the existing finish, timber type and level of wear.
- Clear and prepare the room so the floor can be worked on properly.
- Deep clean or remove surface contamination where needed.
- Sand the floors using the correct grades and equipment.
- Apply wood filler where appropriate to create a smoother overall surface.
- Refine the sanding so the floor is ready for finishing.
- Apply the chosen oil, lacquer or protective finish.
- Allow the finish to cure properly before normal use resumes.
- Follow the right aftercare advice to keep the floor looking better for longer.
This is where a professional approach makes a real difference. Sanding is not just about taking a machine across the boards. It is about understanding the surface, the direction of the grain, the condition of the timber and how the final finish will behave.
What Affects the Final Result?
Not every wooden floor will come up the same way, which is part of the charm. The age, timber, previous finish and day-to-day use all influence the final look.
| Factor | Why it matters |
| Type of wood | Different timbers vary in grain, colour, hardness and how they respond to sanding. |
| Existing finish | Old varnish, oil or stain can affect how much preparation is needed. |
| Wear and tear | Heavy traffic areas may need more careful sanding and blending across the whole floor. |
| Gaps and movement | Wood filler may help improve the overall surface where suitable. |
| Chosen finish | Oils and lacquers create different looks, sheens and maintenance needs. |
| Room use | A hallway, lounge or school floor may need a different finish to suit everyday traffic. |
A high quality finish should not just look good on day one. It should suit how the space is actually used.
Why Full-Floor Restoration Gives a Better Finish
Wooden floors are seen as one surface, especially when light moves across them. That is why full-floor restoration often gives a much more natural and consistent result. When the whole floor is sanded, prepared and finished together, the tone and sheen have a better chance of feeling even across the room.
It also allows the restoration team to work with the character of the timber, rather than against it. Old wooden floorboards can have movement, colour variation and small signs of age, but those details often become part of the finished look when the whole floor is handled properly.
Choosing a Wood Floor Sanding Company
A good wood floor sanding company should be able to talk you through the process clearly before the work begins. The aim is not just to sand the floors, but to help you understand what is realistic, what finish will suit the space and how to look after it once the work is complete.
What to Ask Before Booking Restoration Services
Before choosing a company, it is worth asking about their equipment, dust control, finish options, experience with different types of wooden floors and how they prepare the room.
Why the Surface of the Floors Matters
The surface of the floors tells you a lot. It shows where the room gets used most, how the old finish has worn, whether the timber still has depth and what kind of preparation is needed. This is why a proper assessment matters before any sanding begins.
DIY sanding can be tempting, but it is easy to create dips, lines and uneven areas with the wrong equipment. It can also create a lot of dust, so a dust mask and proper safety precautions are essential if anyone is attempting preparation themselves. For a smoother, cleaner and more controlled result, professional sanding is usually the better route.
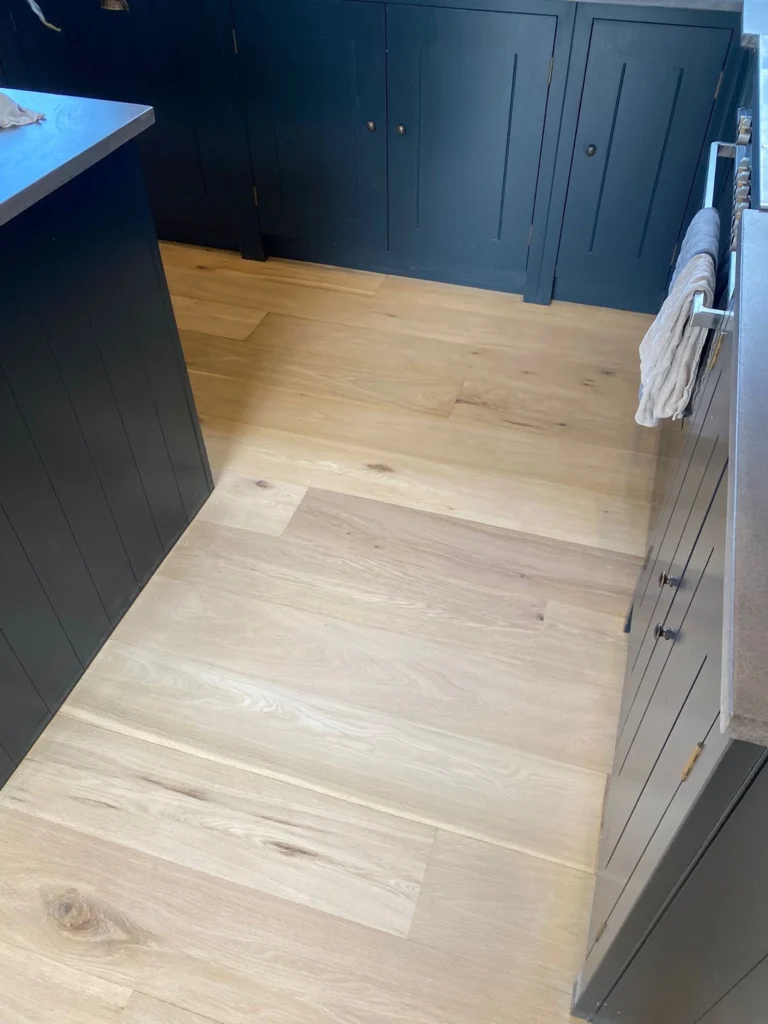
Finish Options for Reviving Wooden Floors
The finish is what protects the timber and shapes the final look. Some people want a natural, understated finish. Others prefer something richer, warmer or with more sheen.
Common options include:
- Matt lacquer for a subtle, modern look
- Satin lacquer for a soft, practical sheen
- Natural oil for a warmer, more traditional feel
- Hardwearing finishes for busy homes, halls and commercial spaces
- Tinted finishes where the room needs a change in tone
The right choice depends on the floor, the room and how much foot traffic the space receives.
How to Keep a Revived Wooden Floor Looking Good
Once the restoration is complete, aftercare makes a big difference. Wooden floors do not need to be difficult to live with, but they do benefit from the right routine.
Use soft pads under furniture, clean with suitable products and avoid soaking the floor with water. Entrance mats can also help reduce grit, which is one of the main causes of fine scratching in busy areas.
For commercial or high traffic spaces, a maintenance plan can help protect the finish and keep the floor looking fresh for longer.
Ready To Revive Your Wooden Floor?
If you are wondering how to revive a wooden floor, the best starting point is a proper look at the whole space. With the right sanding, preparation and finish, tired wooden floors can become one of the best features in the room again.
Sussex Floor Restoration provides wood flooring restoration services designed to bring out the character of the entire floor, with proper support from start to finish.
To talk through your floor, contact us on 01444 810505 or email info@sussexfloorrestoration.co.uk.
If you liked this, you may also like: A Faded Wood Floor Can Still Be Revived Rather Than Replaced
Frequently Asked Question About How To Revive A Wooden Floor
You revive a wooden floor by cleaning, sanding, preparing and refinishing the whole surface. This removes tired coatings, smooths the timber and gives the floor fresh protection.
Yes, many old wooden floors can look dramatically better after professional restoration. Sanding and finishing can reveal the natural grain, colour and character hidden under years of wear.
Yes, sanding the whole floor gives a more even and natural result. It helps the tone, texture and finish stay consistent across the entire room.
Most domestic wooden floor restoration projects take a few days, depending on the size of the space, floor condition and chosen finish. Larger or high-traffic areas may need longer.
Modern professional sanding equipment is designed to control dust much better than older methods. There can still be some fine dust, but a good wood floor sanding company will keep this to a minimum.
The best finish depends on how the room is used. Lacquer is often chosen for durability, while oil can give a warmer and more natural appearance.
Yes, many scratches can be reduced or removed as part of a full sanding and refinishing process. Deeper marks may still leave some character, but the overall floor should look much cleaner and more balanced.
It depends on foot traffic, cleaning habits and the type of finish used. Busy homes and commercial spaces may need attention sooner than quieter rooms.
Professional sanding is usually worth it if you want a smooth, even and long-lasting finish. The right equipment and experience help avoid sanding marks, dips and patchy results.
Use suitable wood floor cleaners, avoid soaking the surface and place protective pads under furniture. Regular sweeping or vacuuming also helps stop grit from scratching the finish.